Product
RRTR
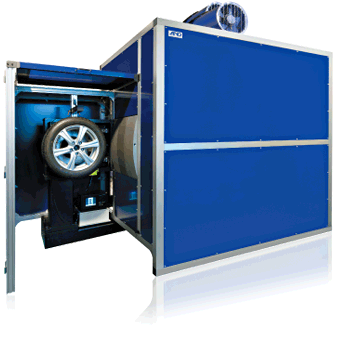
Tire Rolling Resistance Test Rig
High accuracy and stability achieved through
Model Based Sensor (MBS) technology
Features
- High accuracy and robust measurement
- Rolling resistance : PC ≤ ±0.3N TB ≤ ±0.5N
- Measurement reproducibility : σ ≤ 0.005N/KN
- Test standards compliance
- Fully automated
- Energy saving from aluminum cast drum
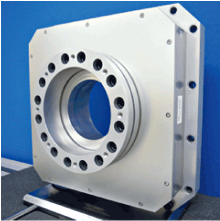
6 components sensor
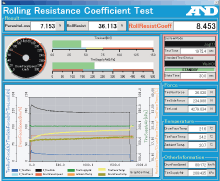
Main window
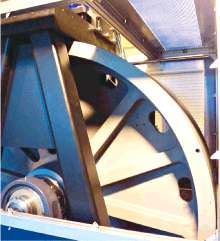
Drum
High accuracy and robust measurement
Model Based Sensor (MBS)
The core component for measuring rolling resistance used A&D's in-house measurement technology with a digital sensor, which minimizes cross-talk error and measures 6 components of force with high accuracy.
Temperature monitoring and compensation
Three temperature sensors are installed in the system to monitor atmosphere, tire surface, and drum surface temperature. In addition, 6 components of force are digitally measurement, and then optimal temperature compensation is applied to achieve the ideal measurement, A temperature chamber option is also available.
Highly rigid design
The drum and tire stands are designed to have high rigidity for precise tire alignment and measurement, which results in a high measurement reproducibility with σ ≤ 0.05N/kN. This enables an optimized sample check for tire lots.
Test standards Compliance
- The testing system supports international test standards required for tire testing.
Standards include ISO 28580. - All the test sequences are pre-programmed and fully automated.
Fully automated testing
- In addition standards tests, user specific test patterns can also be programmed.
- Up to 20 different test patterns can be scheduled.
- Test data including test condition information is saved in CSV format for flexible usage.
Energy savings from the aluminum cast drum
- A&D introduced the world's first test drum using an aluminum cast drum.
- The aluminum cast drum reduces the inertia of the drum by almost half.
Compared to a steel drum, system operating energy is reduced by 30%. (According to in-house testing)
Measurement data
Measurement data with a standard tire.
| Calculation | Measurment | Skin test measurment | |||||||||||||
|---|---|---|---|---|---|---|---|---|---|---|---|---|---|---|---|
| Rotation direction | RR | RR temp.correct | RRC | Spindle force | Tire load | Distance (Drum surfacetyre axis) |
Ambient temperature | Tire surface temprature | Drum surface temprature | Drum speed | Spindle force | Tire load | Distance (Drum surfacetyre axis) |
Parasitic loss | |
| [N] | [N] | [N/kN] | [N] | [N] | [mm] | [℃] | [℃] | [℃] | [km/h] | [N] | [N] | [mm] | [N] | ||
| 1 | Normal | 30.21 | 30.42 | 7.12 | 27.48 | 4272 | 286.87 | 25.9 | 28.8 | 26.4 | 80.02 | 3.94 | 100 | 308.50 | 5.15 |
| Reverse | 30.64 | 30.98 | 7.25 | 27.49 | 4272 | 286.84 | 26.4 | 28.6 | 26.0 | 80.02 | 3.61 | 100 | 308.54 | 4.73 | |
| 2 | Normal | 30.69 | 30.71 | 7.19 | 27.78 | 4272 | 286.95 | 25.1 | 28.4 | 26.0 | 80.02 | 3.86 | 100 | 308.53 | 5.06 |
| Reverse | 30.78 | 30.87 | 7.23 | 27.55 | 4272 | 286.96 | 25.4 | 28.2 | 25.7 | 80.03 | 3.58 | 100 | 308.57 | 4.68 | |
| 3 | Normal | 30.67 | 30.64 | 7.17 | 27.81 | 4272 | 287.06 | 24.9 | 27.6 | 25.1 | 80.03 | 3.91 | 100 | 308.56 | 5.12 |
| Reverse | 30.77 | 30.69 | 7.18 | 27.62 | 4272 | 287.02 | 24.7 | 27.8 | 25.3 | 80.03 | 3.65 | 100 | 308.58 | 4.78 | |
RRC repeatabillty
| 1 | 2 | 3 | Ave. | σ | |
| Normal | 7.12 | 7.19 | 7.17 | 7.16 | 0.035 |
| Reverse | 7.25 | 7.23 | 7.18 | 7.22 | 0.034 |
| Avarage | 7.19 | 7.21 | 7.18 | 7.19 | 0.015 |
Test tire information
- Size & specifications 195/55R16 87V
- RR (Data sheet) 30.8[N]
- RRC(Data sheet) 7.21[N/kN]
Calibration device
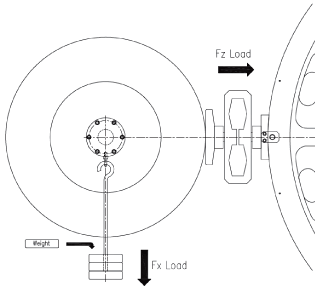
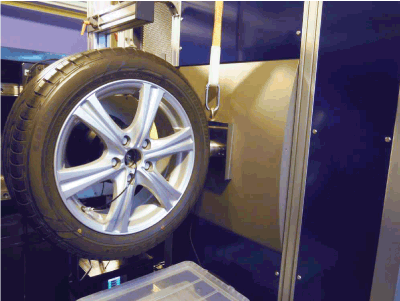
A&D is well versed in force measurements and offers a high-quality calibration device that has been manufactured in-house for calibrating the system on site. The calibration device is available as an option and the user can calibrate the system themselves for easy maintenance, or an A&D engineer can visit the user's site for periodical calibration service.
Calibration device
Layout options
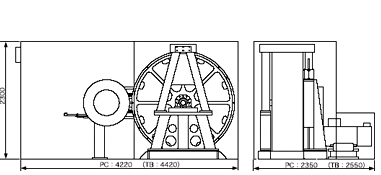
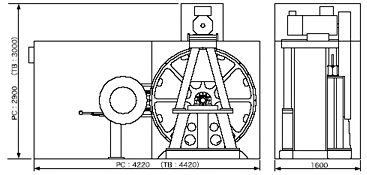
When installing the testing machine, space may be limited. However, the position of driving motor can be selected, which provides flexibility when installing the testing machine.
Specifications
| Specification | |||
| Passenger Car (PC) | Truck and Bus (TB) | ||
| Measurment/Control range | Tire load force | 10 to 15000N | 50 to 60000N |
| Inflation pressure | 10 to 400kPa | 100 to 1000kPa | |
| Drum surface speed | 5 to 120km/h to 270km/h (option) | ||
| Spindle force (Rolling resistance) | ±300N | ±500N | |
| Tire stand stroke *1 | 200 to 500mm | 300 to 760mm | |
| Tite stand | 1position / 2position (option) | ||
| Instrumention accuracy | Tire load force | ±10N | ±30N |
| Inflation pressure | ±1kPa | ||
| Spindle force | ±0.3N | ±0.5N | |
| Distance (Tire axis to the drum surface) | ±0.5mm | ||
| Temoerature sensor | ±0.2℃ | ||
| Drum surface speed | ±0.05km/h | ||
| Time | ±0.001sec | ||
| Control accuracy | Tire load force | ±20N | ±45N |
| Inflation pressure | ±3kPa | ||
| Drum surface speed | ±0.2km/h | ||
| Test tire | Tire diameter | σ500 to 900 | σ700 to 1500 |
| Rim size | 12" to 24" | 18" to 24" | |
| Tire weight | 60kg | 160kg | |
| Tire stand alignment | Load application | ≤1mrad (≤0.057°) | |
| Camber angle | ≤2mrad (≤0.114°) | ||
| Slip angle | ≤1mrad (≤0.057°) | ||
| Drum | Diameter | 2.0m / 1.7m (option) | |
| Width | 600mm | ||
| Frame material | Aluminum / Steel (option) | ||
| Test surface roughness (Drum) | Surface roughness | 6.3S | |
| Surface material | Stainless steel (SUS420J2) | ||
| Measurment reproduciability (σ) | Rolling resisitance coefficient | ≤0.05N/kN*2 | ≤0.06N/kN*2 |
| Measurment point | Ambient temperature | 0.6m from the center line of drum width | |
| Installation requirement | Installation environment temperature | 5 to 35℃ | |
| Floor weight capacity | 2000kg/m2(aluminium cast drum) | 2500kg/m2(aluminium cast drum) | |
| Utility | Power supply | AC380 to 460V ±10% 50/60Hz ±5% 120kVA*3 |
AC380 to 460V ±10% 50/60Hz ±5% 180kVA*3 |
| Air | Higher than 0.5MPa | ||
| Size | Main body | W:4220mm D:1600mm H2900mm |
W:4220mm D:1600mm H3000mm |
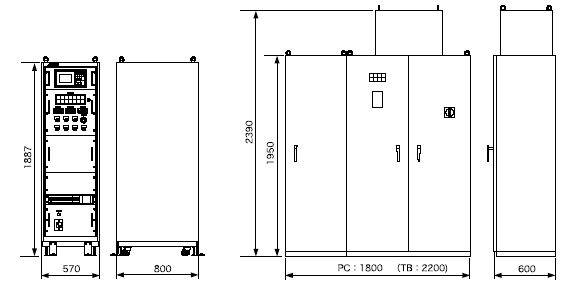
| Motor cabinet | W:1800mm D:600mm H2350mm |
W:2200mm D:600mm H2350mm |
|
| Operating cabinet | W:570mm D:800mm H1887mm |
||
| Other | Options | Constant temperature chamber | |
| Calibration device | |||
- *1 Distance from the roller surface to the center of tire rotation.
- *2 Standard deviation of three consecutive tests is the reproducibility value. The temprature variation for the three tests must be within ±1℃. If the environment tempreture cannot be controlled to meet this requirement, we offer a constant-tenprature chamber as an option. Please feel free to contact us when this option is necessary.
- *3 Power supply specifications depend on the selected drum material.